How to Crop an Image in Photoshop
Cropping an image in Photoshop is a quick way to remove anything you don’t need from a photo or bring the focus onto a particular part of it.
Once you know where the main controls are, there’s really not much to it.
Using the Crop Tool in Photoshop
Open your image and choose the Crop Tool from the toolbar. You can also press C on your keyboard.
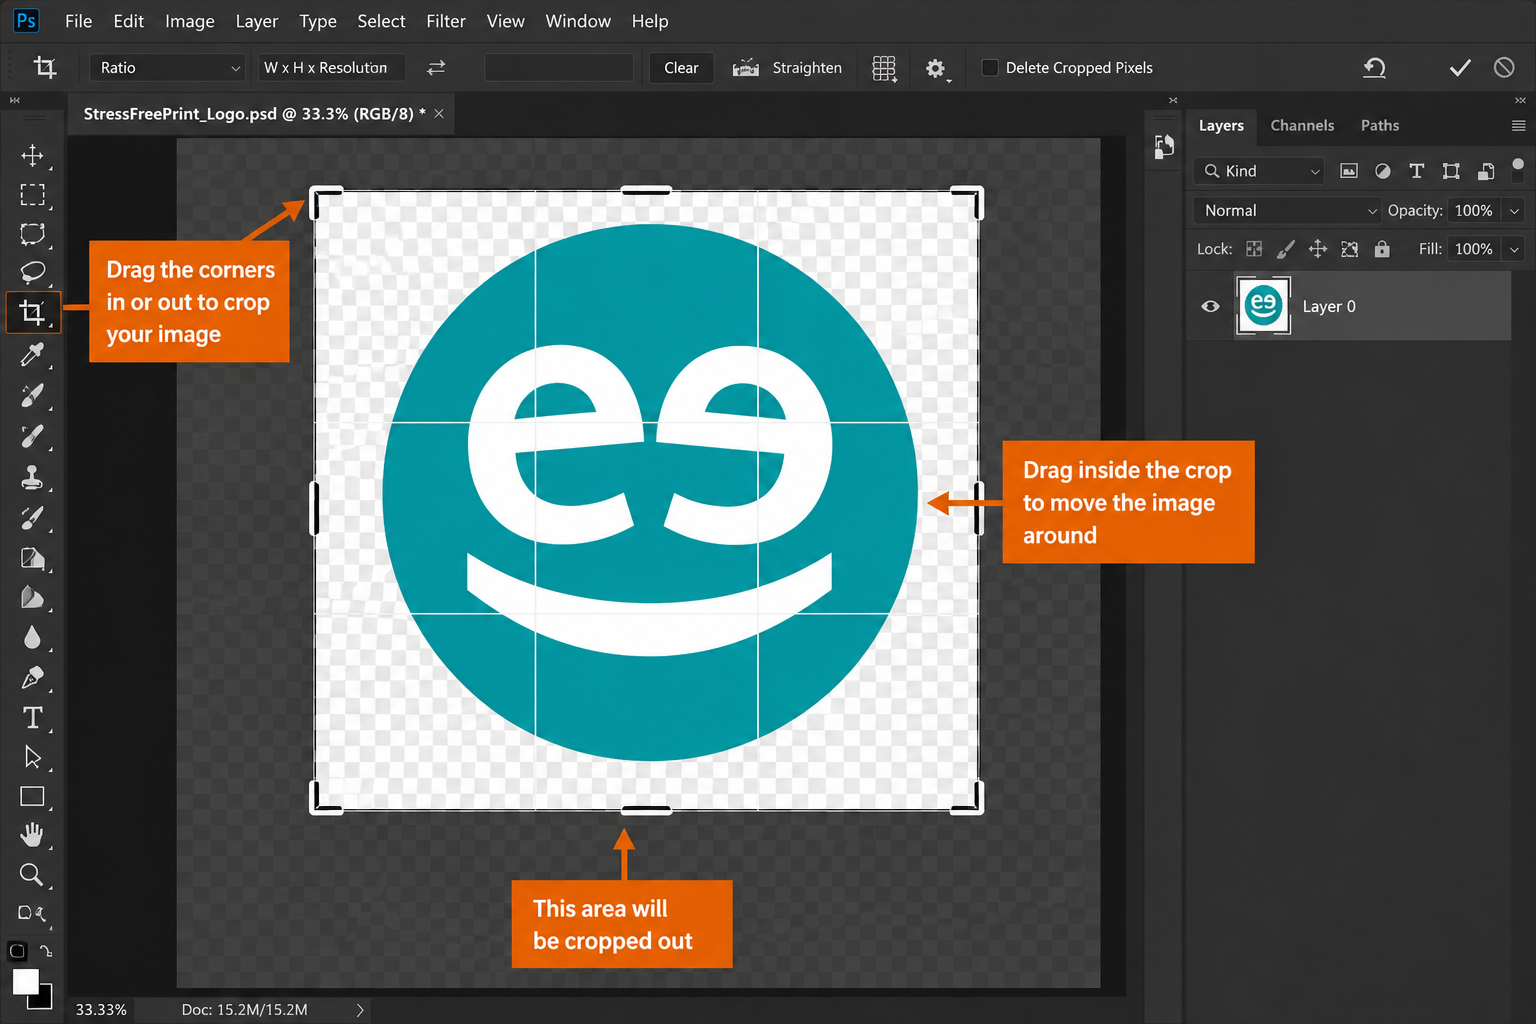
A border will appear around your photo. Drag the sides or corners until you’ve got the area you want, then click inside the crop if you need to move the image around.
You’ll still be able to see what’s sitting outside the crop, so have a look around the edges before you apply it. Once everything looks right, press Enter or click the tick at the top.
If you think you might want to change the crop later, leave Delete Cropped Pixels unticked. That way, the parts you’ve cropped out aren’t gone for good.
If you’re working to a particular proportion, you can choose an aspect ratio from the options at the top of Photoshop. This works well when you’ve got several photos going into the same piece of artwork and want them all to sit in a similar way.
Already know the dimensions you need? You can enter those here too. Just check whether you’re working in pixels, millimetres or another unit before you start.
Cropping One Layer
If your Photoshop file has several layers and you only want to crop one of them, the Crop Tool isn’t quite what you need. It changes the whole canvas rather than the individual layer.
Instead, select the layer you’re working on, make a selection around the part you want to keep and add a Layer Mask.
Everything outside that area will be hidden rather than deleted, so you’ve still got the rest of the image there if you need it later.
Cropping an Image to a Shape
Sometimes you might want a photograph to sit inside a circle or another shape rather than a standard square or rectangle.
For a circle, use the Elliptical Marquee Tool to select the area you want, then add a Layer Mask. You can still move the photograph around afterwards to get it sitting where you want it.
Cropping an Image for Print
Cropping an image for print needs a little more thought, especially if you’ve cropped quite closely into the original photograph.
The smaller the section you’re left with, the more noticeable any loss in quality can become when you make it bigger. A photo cropped for a small space on a leaflet might look absolutely fine. Stretch that same crop across a large poster and you could start to notice the difference.
Have a look at the image at roughly the size you’re actually planning to use it rather than judging it while it’s small on your screen.
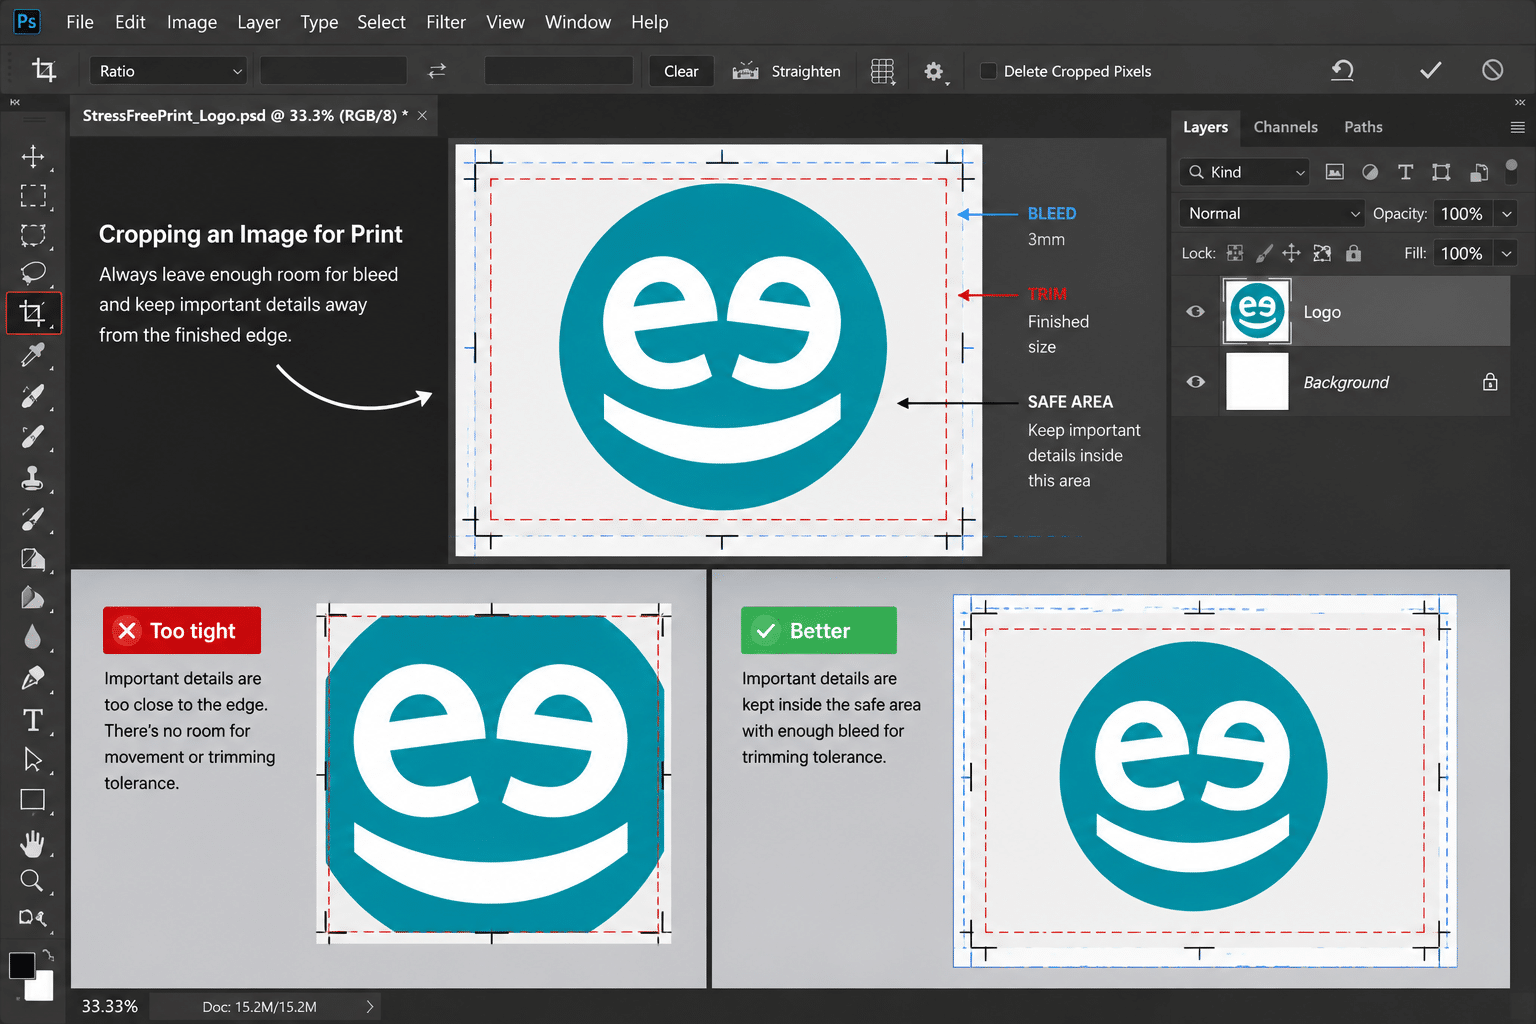
If it runs right to the edge of your artwork, remember the bleed too. Give the image enough room beyond the trim and keep faces, logos, text and anything else important away from the finished edge.
And keep hold of your original Photoshop file. You might never need it again… but if you decide later that the crop was a little too tight, you’ll have the full image there to go back to.